
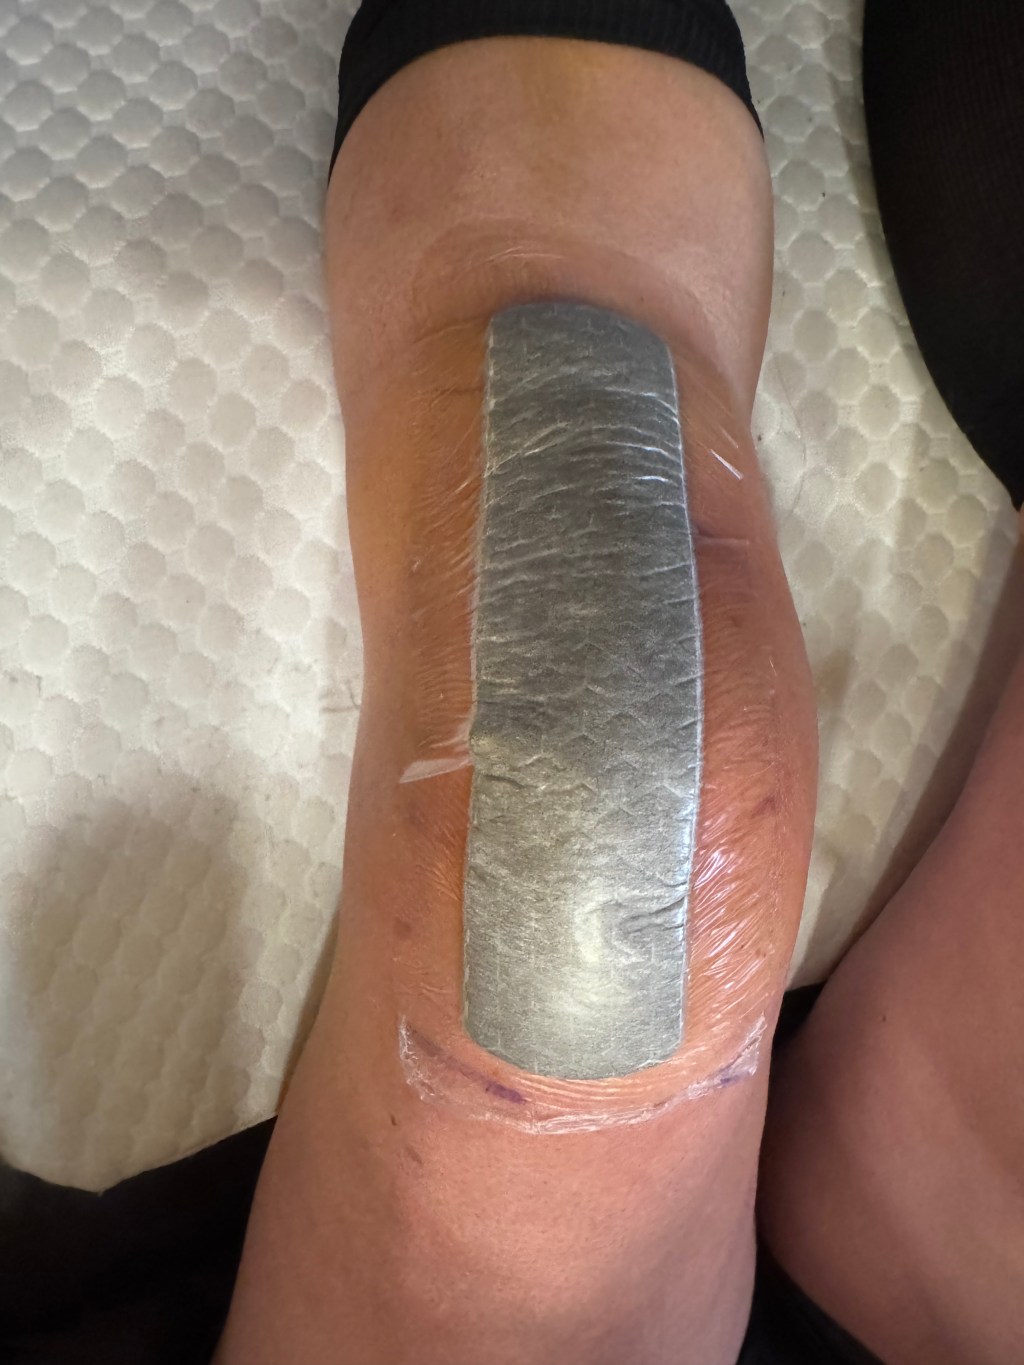
My First Two Weeks of Recovery
Two weeks ago, I had a partial knee replacement. If you’ve ever gone through a joint replacement, hats off to you. This recovery has been far more painful and exhausting than I ever imagined.
I’m still very early in the recovery process, but I’ve already learned a lot about what helped, what I wasn’t prepared for, and what I wish I had done differently before surgery.
I did plenty of research beforehand. I talked to people who had knee replacements. I bought and borrowed equipment. I knew there would be pain, physical therapy, icing, and a recovery period.
But there were still plenty of surprises. Some of them were big, others were small. But together they’ve made recovery a lot easier.
One quick note before we begin: I’m not a medical professional, and this isn’t intended to be medical advice. Think of this as one patient’s journal and checklist of the things that helped during the first two weeks after my partial knee replacement. Every recovery is different, so always follow the guidance of your surgeon, physical therapist, and healthcare team.
Here are some of the things I’ve learned during my first two weeks of recovery.
1. Set Up Your Recovery Area Before Surgery
Before you leave for surgery, prepare the area where you’ll spend most of your recovery time. I knew I would need a comfortable place to sit, ice, and elevate my knee. I didn’t realize just how much time I would spend in that one spot.
Once you get home, the last thing you want is to realize that your phone charger is upstairs, your ice packs are in another freezer, or the comfortable shorts you want are in the laundry.
I already had a recliner, and it has become recovery headquarters.
Here are the things I keep nearby the recliner:
- Wedge pillow to elevate my leg
- Back support pillow
- Neck pillow
- Blanket (Even though it’s 100 degrees outside)
- Lap desk/pillow for my laptop, meals
- Insulated water bottle
- Snacks that don’t need refrigeration
- Phone and device chargers
- Medications and pill organizer
- Tissues and personal items
- Grabber device
- Trash bag/small trash can
The trash bag seems like a small thing, but when getting up is difficult, you quickly realize how many tissues, wrappers, empty water bottles, and other random things accumulate around you.
And then there’s entertainment.
For me, the timing of surgery has been surprisingly perfect. I’ve been able to watch the World Cup during the day and Love Island at night. If you’re going to be stuck in a recliner icing your knee for hours, having something you’re excited to watch definitely helps. I thought I’d be reading a lot. I had so many books lined up, but it’s been too hard for me to concentrate on reading.
Before surgery, I’d also recommend clearing pathways through your house. Walking with a walker takes more room than you might expect, and rugs, cords, clutter, and furniture can suddenly become obstacles.
2. Get the Right Equipment, and Make Sure It Fits
I borrowed and purchased several things before surgery, but some of the most useful items were things I didn’t fully appreciate until I needed them.
The first was a raised toilet seat. I borrowed one and didn’t think much about it beforehand. It turned out to be far more important than I realized it would be.
The second was my walker. The walker I originally had didn’t extend high enough for me. Fortunately, another patient at physical therapy had moved on to using a cane and lent me hers. Also, my primary bathroom is very small and the walker does not fit in there easily, so it made my choice to sleep in my recliner in the family room and use the guest bathroom a lot easier.
Lesson learned: Don’t just make sure you have the equipment. Make sure it fits you and that you know how to use it before surgery.
My most useful equipment has included:
- Raised toilet seat (also works as shower seat)
- Walker properly adjusted for my height
- Cane (you need one to walk the stairs right away)
- Grabber/reacher tool
The grabber has been much more important than I expected. You will drop things. They will always seem to land just far enough away that you can’t reach them.
Having a grabber nearby means you don’t have to struggle to bend down or ask someone for help every time your phone charger, sock, or TV remote hits the floor.
3. Ice, Elevate, Exercise, Repeat
I knew I would need to ice and elevate my knee. I didn’t realize how much of my life would revolve around it.
The things I’ve used most include:
- Ice machine made for knees (circulates ice water from a cooler through wrap on knee)
- Multiple gel ice packs
- Frozen bottles of water for the ice machine
- Cloth or pillowcase to put between my skin and ice packs
- Wedge pillow for elevation
- Exercise bands and stretching strap for home physical therapy
Having multiple icing options has been helpful. The ice machine is great when I’m staying in one place for a while, while the gel packs are easier when I don’t want to deal with setting up or refilling the machine. If you use an ice machine, just make sure you’re not using it too often. I have one that has a timer, which has been super helpful. Having a pillowcase to put the ice packs in has also been great because it’s thinner than a dish or hand towel.
Two weeks after surgery, my knee is still tight, painful, and swollen. I’m tired of icing and elevating, but if I sit normally for more than about 30 minutes, the pain and swelling increase.
4. Make Food, Water, and Medications Easy
One of the simplest things is a weekly pill organizer with morning/night slots. You will not remember when you took things. When you’re tired, in pain, sleeping at strange times, and taking multiple medications on different schedules, it becomes difficult to remember what you took and when.
Use a pill organizer, write everything down, set alarms on your phone, use an app, or have someone help you keep track.
I’ve also kept a large insulated water bottle and snacks that don’t need refrigeration beside me… if you wake up in the middle of the night and need to take pain medication with food, you’ll be all set. I’ve heard that some people use a minifridge.
You don’t want to make things too easy, though! You need to get up and move around and not keep your leg in the same position for too long. I have a small tote bag that I can hang on my walker to carry small things around with me.
5. Plan for More Help and More Time Than You Think You’ll Need
I didn’t realize I wouldn’t be able to drive for the first month. This was probably my biggest miscalculation.
I didn’t have home PT, so before surgery, I scheduled all of my physical therapy appointments at times that were convenient for me. There was just one problem. I wasn’t the person who would be driving me. Suddenly, all of those conveniently scheduled appointments also had to work with someone else’s schedule.
Before surgery, figure out who will drive you to physical therapy, follow-up appointments, the pharmacy, and anywhere else you may need to go. Then schedule your appointments with their availability in mind, too.
I also underestimated how long it would take me to return to work. I work virtually, so I assumed I would take off a few days after surgery and get back online the following week.
That did not happen. I was still sleeping much of the day until about 10 days after surgery.
Even working from home requires concentration, energy, the ability to sit comfortably, and the ability to stay awake for more than short periods of time. My surgeon recommended taking off a month before returning to work.
Recovery takes over your day. Between medications, exercises, walking, physical therapy, icing, elevating, eating, and sleeping, there isn’t much time or energy left for anything else.
Two Weeks Later: Making Progress Still Hurts
I’m walking better. I’m doing my physical therapy exercises. I can do more than I could immediately after surgery. But it still hurts a lot. I still need help. I can’t carry things or bend down or take the dog out.
My knee is tight, painful, and swollen and the numbness is wearing off. I can’t sit normally for long periods without the swelling and discomfort increasing. I’m tired of icing. I’m tired of elevating. I’m tired of thinking about my knee. And yet, I’m still making progress.
Sometimes I feel like I can walk without the walker, and then in an instant as I’m counter cruising around the kitchen, I feel like I’m falling backwards and losing my balance and tumbling into the refrigerator. In my head I can’t move my bad leg back to save myself, so it’s all mind over matter.
You can be getting better and still be in significant pain. Both things can be true at the same time.
My Knee Replacement Recovery Checklist
If you’re preparing for knee replacement surgery, here’s my personal list of the things that have helped me most:
- Recliner or comfortable recovery chair
- Wedge pillow
- Back support pillow
- Neck pillow
- Blanket
- Lap desk/pillow
- Raised toilet seat
- Properly fitted walker
- Tote bag with long straps to drape over walker
- Cane
- Grabber/reacher tool
- Ice machine
- Multiple gel ice packs
- Frozen water bottles for the ice machine
- Cloth or pillowcase for protecting your skin while icing
- Exercise bands and stretching strap
- Pill organizer and medication tracking system
- Large insulated water bottle
- Easy meals and snacks
- Loose, comfortable clothing
- Slip-on shoes
- Compression socks, if recommended
- Shower/bath wipes/sponges (foam activated with water, no rinsing needed)
- Phone and device chargers within reach
- Trash bag or small trash can
- Plenty of entertainment
I’m sharing this because I read plenty of information about knee replacement surgery beforehand, talked to people who had been through it, and tried to prepare.
There were still so many practical things I didn’t expect.
If you’re preparing for knee replacement surgery, I hope something on this list makes your first few weeks of recovery a little easier.
And if you’ve already been through a knee or other joint replacement, I have a whole new appreciation for what recovery from joint replacement surgery really involves.
Read my latest story about my knee replacement, two months after surgery.
A Resource You May Find Helpful
My first two knee replacement posts have become some of the most popular posts on my blog. Clearly, many people are looking for a better idea of what this experience might involve.
Through sharing my recovery, I was introduced to a comprehensive paid PDF guide from a knee specialist in the UK, Tom Morgan Physio Solutions. The guide is over 100 pages and I found it to be much more detailed than the information I personally received from Johns Hopkins for my surgery. I wish I’d had something this thorough to read as I prepared for surgery and recovery!
You can learn more about the Total Knee Replacement Physiotherapy Guide and decide whether it would be useful to you. If you purchase the guide through this link, I receive a referral fee.
Click here and use the discount code ALISSA10 to get 10% off the published price, (£24.99 reduced to £22.49).
A few things to keep in mind: the guide comes from the UK, where recommendations and care practices may differ from those in the United States. Sharing it does not mean I endorse every recommendation it contains. Please discuss any changes to your exercises, medications, or recovery routine with your own physician or physical therapist first.
For me, its value is having more information in one place, and more questions to bring to my healthcare team.
All of my knee surgery blogs:
Knee Surgery: Two Weeks Out
Knee Surgery: Two Months Out
Knee Surgery: Three Months Out


Leave a Reply